How to Add an Item
Note: In order to add an item, the RoleThe role is a collection of system features. Each feature has an access level of either read-only or edit. A role is assigned to a user. The user has access to the features found in the role. of the Logged-in UserAn IntelliTrack user has an account with IntelliTrack and uses the software; is active in the system; has a valid username and password; is assigned to at least one division and one site; has a default division and a default site. The user is designated as either an Administrative User or a Standard User. must contain edit access to the Items featureAccess to this feature enables the Manage > Items option in the web application and in the mobile application. In edit mode: add, edit, delete item records in the web application; add items in the mobile application..
When adding an item, the Item Number is required and it must be unique within the division. All other fields and options found at the Add Item form are optional, however, sort functions and reporting functions will be more useful and robust when the item record is complete. An item is considered active by default.
Important: If your division uses multiple units of measure, at least one unit of measure (UOM) is also required for this item.
Before adding the items, we recommend that you define the items the site contains. (Typically, these items and descriptions are already defined in the system that is currently processing invoices.)
Depending on the division settings and features available the item may contain the following attributes:
- Lot: a lot is required for the item when it is added to inventory.
- Serial Number: a serial number is required for the item when it is added to inventory.
- Expiration Date: an expiration date is required for the item when it is added to inventory.
-
- Asset: item becomes an asset-type item; assets may be added to it.
- Track Cost: track cost for the item when added to inventory during a stock receipt transaction, stock return transaction, or item receive transaction.
An item is added from the Add Item form:
- Select Manage > Items from the navigation pane to reach the Manage Items page.
- The Manage Items page appears.
- To add an item, select the Add icon
 in the top right area of the page, above the grid. The Add Item form appears.
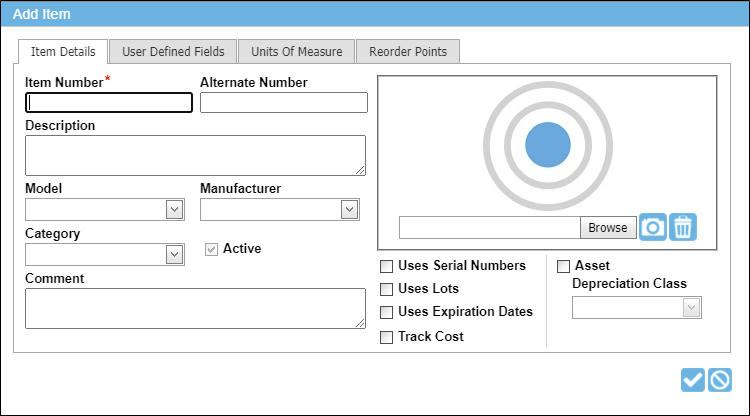
- Item Details Tab: The Item Details tab (see "Item Details" for more information) is to the front. Enter detailed and descriptive information about the item at this tab.
- Item# (required): Enter the item number in the Item# field. The item number must be unique within the division.
- Alt. Number (optional): Enter the alternate item number in the Alt. Number field. The alternate item number must be unique within the division.
- Description (optional): Enter the description in the Description field.
- Model, Manufacturer, Category (optional): Select corresponding lookup values for the item: model, manufacturer, and/or category.
- Active checkbox: marked by default. Indicates active status of the item. When an item is active, this checkbox is marked. When an item is inactive, the checkbox is not marked.
- Comments (optional): Enter any comments for the item in this area.
- Picture (optional): Link a image file to the item (see "Adding an Item Image" for more information). Accepted image file formats include: .png, .jpeg, .gif.
- Uses Serial Numbers checkbox:
- when marked, a serial number is required when adding this item to inventory.
- when unmarked, a serial number is not allowed for this item when adding it to inventory.
- Uses Lots checkbox:
- when marked, a lot is required when adding this item to inventory.
- when unmarked, a lot is not allowed when adding this item to inventory.
- Uses Expiration Dates checkbox:
- when marked, an expiration date is required when adding this item to inventory.
- when unmarked, an expiration date is not required when adding this item to inventory.
- Track Cost checkbox: available when unit cost tracking is on for the default division of the logged-in user.
- when marked, the unit cost will be tracked for the item when a receipt transaction, return transaction, or receive item transaction is performed for the item.
- when unmarked, the unit cost will not be tracked for the item when a receipt transaction, return transaction, or receive transaction is performed for the item.
- Uses RFID checkbox: available when the role of the logged-in user contains the RFID featureThis feature is available in edit mode only. It enables RFID in IntelliTrack. The RFID option at the Add/Edit Division form is enabled with this feature. When RFID is enabled for a division, the user can track items via RFID in IntelliTrack. and the default division uses RFID.
- when marked, an RFID tag number (optional) will be accepted when adding this item to inventory.
- when unmarked, an RFID tag number will not be accepted when adding this item to inventory.
- Assets checkbox: available when the role of the logged-in user contains the Assets feature. When marked, the item becomes an asset-type item (see "Asset Type Item").
- Depreciation Class field: available when the role of the logged-in user contains the Depreciation feature. Associate an asset-type item with a depreciation class by clicking the drop-down arrow in this field and selecting a depreciation class from the list that appears. (A depreciation class is added to IntelliTrack at the Depreciation Classes page.)
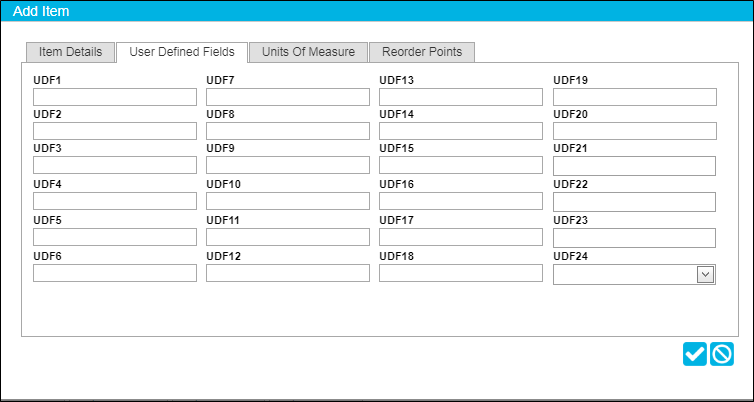
- User Defined Fields Tab: Enter customized information about the item in the twenty four user-defined fields (optional) available at the UDF tab (see "User Defined Fields" for more information). Click the UDF tab to bring this portion of the screen to the front.
- Units Of Measure Tab: when the division uses Multiple units of measure, at least one unit of measure is required for the item. Add a unit of measure to an item at the UOM Tab. Click the UOM Tab to bring it to the front.

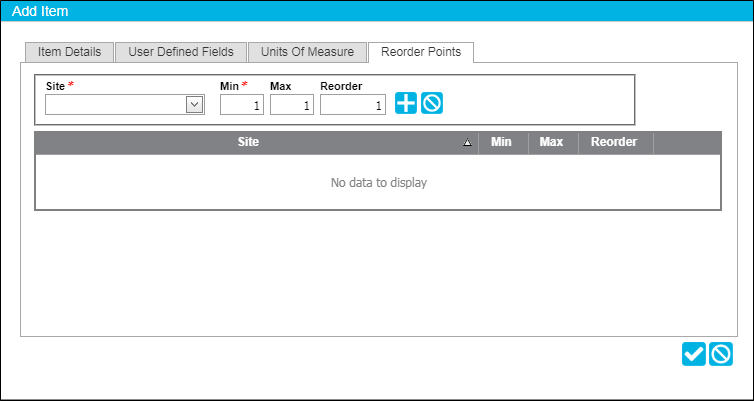
- Reorder Points Tab: when a site uses Min Max Values, a Reorder Points tab will be visible. Add item reorder points for the site at this tab (optional).
- Check Out/Rental Settings Tab: When the Asset checkbox is marked, this tab becomes visible. Enter check out and/or rental settings in this tab.
- Tap the Save icon
 to close the Add Item form and return to the Manage Items page. The item appears in the Manage Items page.
Editing an Item
Once an item is added, it may be edited; see "Editing an Item" for more information.
Deleting an Item
An item may be deleted if it is not in use by the system; see "Deleting an Item" for more information.
Adding QuickBooks Items
QuickBooks items are added to IntelliTrack during a data sync; see "IntelliTrack for QuickBooks® Desktop Synchronization Options" for more information.
Adding QuickBooks Online Items
QuickBooks Online items are added to IntelliTrack during a data sync; see "Synchronization Options".